Saturday, October 26, 2013

Windows Server 2012 – Install and Configure Remote Desktop Services

In this guide we will install and configure the Windows 2012 Remote Desktop Services Role. We will configure the website for RDWEB access and also configure remote app apps locally through the remote desktop client. Before we start bare in mind RDS is not supported on a Domain Controller, it may work but you may come across lots of issues while installing, also if you plan to connect to applications with the remote web site (RDWEB) and do not want an annoying certificate error for your users  then you will need a certificate which matches the A Record you want to hit externally. For example remote.techieshelp.com. SSL Certificates are available from Go Daddy . Once purchased then read how to install SSL certs into iis7 here. Read on!

Windows 2012 Install Remote Desktop Services

As with all other roles we need to first launch Server Manager so we can install the Remote Desktop Services Role, once launched then select “Manage” from the top right hand corner and select Add Roles and Features as seen below.
add roles and features server 2012
You will now see the standard welcome splash screen, click next to continue. On the next screen you get to choose what type of Installation type we are doing. Select Remote Desktop Services Installation. Then click next. ( Remember click the images to zoom in. )
remote desktop services installation
In my environment I will be running a single server, as you can see there is a wizard for this called “Quick Start”, select this option to continue.
Single server remote desktop
In remote desktop services 2012 you get the option of deploying full virtual desktops with their own applications or traditional session based desktops that can be published via a web-page or via remote app. Here we aredeploying a session based environment. Select this option and continue.
Remote desktop session based
The following screen states that it will install all of the required roles on one server. in a multi server environment you create a pool and you can select what role is installed to each server, you can load balance etc if your environment is a large remote desktop environment. In this deployment all the roles are on one server. Click next.
Remote desktop services pool
You wll now see the summary screen, to start the installation you must put a tick in the box to accept the server will reboot, Do so and click deploy.
The server will now go away and install the roles. Once done click close. The server will reboot.Upon reboot remote Desktop Services will continue to install, once done close the screen/

Server 2012 – Configure Remote Desktop Services

You will see in server manager you now have a Remote Desktop Services option. We now have a nice network diagram as seen below, the sections we are going to configure first is RD licensing.

Configure remote desktop servers.
Click the RD licensing icon and either add the server as your license server or point it to your existing license server on the network by entering the server name or IP then click the forward arrow. Then click next then add to install the role

install remote desktop licensing

Setting Up Remote Desktop Licensing Server 2012

We now need to configure server 2012 remote desktop licensing.You will need to purchase Remote Desktop CALs these are concurrent which means you buy the amount of licenses for the amount of people that will use remote desktop services, so even if 10 people use RDS but only 5 will be on at any one time then 5 is enough. You canget  a single Remote Desktop CAL or a Remote Desktop 5 User Cal direct from the Microsoft Store
iconOnce done as the diagram below shows select Deployment Overview then Tasks. Edit the Deployment properties. Select RD licensing, the type of mode / CALS you will use, user or device then click apply.
configure server 2012 remote desktop licensing
Once done we need to add the licenses as the diagram below shows. Select Tools > Terminal Services and launch Remote Desktop Licensing manager, then right click your server and Activate, follow the wizard and enter you companies details until you get to the install licenses screen. Select the type of license you own and etner the detals. Once checked by the Microsoft clearing house the license is now fully configured.
install RD licenses 2012

Server 2012 Remote Desktop – Deploy Applications.

Now the role is installed and licensed correctly we can deploy our applications. They are now called “collections. In Remote Desktop Services in Server Manager. select the collections, you will see the newly created collection called QuickSessionCollection, select it and you can add any application that is installed onto your server. Once selected click confirmation and then publish. We are now ready to access these applications.

deploy applications remote desktop servicesAccessing Remote Desktop Services Applications

Permissions. Any user that you want to be able to access these apps MUST be a member the domain levelRemote Desktop Users in Active Directory. Additionally, in the local server policy check that remote desktop users is allowed to “log on locally“. this is normally enabled by default.
To access the web apps, in your browser of choice hit.
https://servername/rdweb or https://externaldomain/rdweb
You will get a certificate error if you do not own one from  Go Daddy or other SSL providers with your servers name etc, you will also need to add the external A record name if you plan to use from outside the office. Then it is a case of installing the SSL cert into IIS7 . Once logged in with valid credentials you will see your apps.
To launch an app over RDP simply enter the correct details in your connection and save the connection.
RDP launch application
If you have purchased and SSL Cert for RDWEB here is how to install the certificate into IIS7

Thursday, October 24, 2013

How to Use The Migratedatasourcedatafromdpm.Ps1 DPM Powershell Script to Move Data

The Migratedatasourcedatafromdpm.Ps1 DPM Powershell Script  is Included in Service Pack 1 of Data Protection Manager 2007.
The MigrateDatasourceDataFromDPM is a command-line script that lets you migrate DPM data for individual “data source(s)” or all Replica volumes and recovery point volumes to different physical disks. Such a migration might be necessary when your disk is full and cannot be expanded, your disk is due for replacement, or disk errors show up.
Depending on how you have configured your environment, this could mean one of more of the following scenarios for moving data source data:
· DPM Physical disk to another DPM Physical disk
· DPM Data source to different DPM Physical disk
· DPM Data source to Custom volume.
The MigrateDatasourceDataFromDPM script moves all data for a data source or disk to the new volume or physical disk. After migration is complete, the original disk from where the data was migrated from is not chosen for hosting any NEW backups, however the recovery points located on the source disk can be used for restores until the recovery points are expired.
Note: You must retain your old disks until all recovery points on them expire. After the recovery points expire, DPM automatically de-allocates the replicas and recovery point volumes on these disks.
All backup schedules continue to apply and protection of the data source continues as before, but will use the new disk.
After migrating the replica of a data source that has secondary protection enabled, you must start the Modify Protection Group wizard on the secondary DPM server, select the same data source, and complete the wizard. This reconfigures secondary backups to run from the new replica volume on the primary DPM server.
I will walk you through the steps on migrating data source (disk and data) to help you understand what the required commands and the results once the command has completed successfully.
In this first scenario we are going to use the MigrateDatasourceDataFromDPM to conduct a DPM disk to DPM disk migration from start to finish.
In the example below you can see in Disk Manager Disk 1 and Disk 2 is utilized for the DPM storage pool and the replica and recovery volumes are spread across both disks.
clip_image002
From within the DPM UI Protection Group Tab you will see that we have four protection groups with a number of different data sources (Share, SQL, Volume, etc.)
clip_image004
Within the DPM UI Management Tab under Disks you see that we have Disk 1 and Disk 2 allocated to the DPM storage pool
clip_image006
Now we have added two new physical disks to the DPM server which is running Data Protection Manager 2007 SP1, as you will note Disk 3 (4.88GB) and Disk 4 (146.48GB) are listed in Disk Manager and are unallocated and currently basic disks.
clip_image008
After walking through the process of adding Disk 4 as an additional disk to the DPM Storage Pool, you will see that it is now listed in the DPM UI and shows up as 100% unallocated space.
Adding Disks to the Storage Pool
http://technet.microsoft.com/en-us/library/bb795901.aspx
clip_image010
We will now open the DPM command shell and run a command (Get-DPMDisk -DPMServerName <DPM Server Name>) to display the disks.
Get-DPMDisk -DPMServerName RKW2K3-DPM
In order to use the migration powershell command you must use a variable name to hold the array of retured items. In the example below, we have used the variable $disk to hold the Get-DPMDisk -DPMServerName <DPM Server Name> output.
$disk = Get-DPMDisk -DPMServerName RKW2K3-DPM
After running the command you will notice that there are four disks listed, and they are not necessarily arranged in order that disk management lists them. Note that the NTDiskID is the physical disk number (zero based) that disk management lists in the GUI. Note that the NtDiskID are not in numeric order and that disk 0 (windows operating system disk) is not included in the output.
clip_image012
We are now going to use the MigrateDatasourceDataFromDPM.ps1 script to migrate the DPM Physical Disk 1 to Physical Disk 4. ( $disk array element [2] to array element [1] )
(./MigrateDatasourceDataFromDPM.ps1 -DPMServerName <DPM Server Name> -Source $disk[n] -Destination $disk[n])
When using this command the $disk[number] that is used within the brackets is not the NTDiskId but the is the element number in the array list in the $disk variable. This number is always zero based, meaning the 1st element in $disk[0] is physical disk 3 in the above screenshot.
Looking at the output when running the command $disk “DPM Physical Disk 1 is third element in the list starting with 0 this will make Physical Disk 1 = [2] in the list and Physical Disk 4 = [1] in the list so our command will be as follows;
./MigrateDatasourceDataFromDPM.ps1 -DPMServerName RKW2K3-DPM -Source $disk[2] -Destination $disk[1]
clip_image013
The command may take some time depending on the number and size of the volumes on the source disk and once completed you will be back at the DPM Shell prompt.
clip_image015
You will now notice in Disk Management the DPM replica and recovery point volume information which is location on Disk 1 and Disk 2 has been migrated to Disk 4. Any new recovery points for the respective data source will now be located on the new volumes on the new disk, the original volume data on Disk 1 and Disk 2 will still need to be maintained until the recovery point on them expire. Once all recovery points expire on the old disk(s), they will appear as all unallocated free space in disk management, and can then be removed from Windows or be reused.
The MigrateDatasourceDataFromDPM script moves all data for a data source or disk to the new disk or volume. After migration is complete, the original disk from where the data was migrated is not chosen for hosting any new backups. You must retain your old disks until all recovery points on them expire. After the recovery points expire, DPM automatically de-allocates the replicas and recovery point volumes on these disks.
clip_image017
Also since we did a disk migration of Disk 1 to Disk 4, Disk 1 no longer shows up in the DPM UI and will not be used any further for DPM Storage Pool this is normal and is as expected.
clip_image019
After completing the disk to disk migration you will also notice that all of the Protection Groups which used Physical Disk 1 for either or both volumes (replica and Recovery Point) will now show up in DPM as Replica is inconsistent. This is normal and is expected as there has been changes made to the volume and will need to be re-synchronized by running a synchronization job with consistency.
clip_image021
After we have completed the Synchronization job with consistency, all of the Protection groups are now all consistent and up to date and have a Protection Status of OK.
That concludes the Disk to Disk migration, in my next blog we will walk through the process of conducting a Data Source to Disk migration and see how this will help in minimizing the amount of volumes a data source uses.

Friday, October 18, 2013

How To Remove Protection Agent Forcefully From Microsoft DPM 2012 SP 1 Management Console !!

Removing a Protected Computer


Applies To: System Center 2012 - Data Protection Manager, System Center 2012 SP1 - Data Protection Manager

If you don’t want to continue protection of a protected computer, you can remove the protected computer from DPM by using the Remove-ProductionServer.ps1. This will not uninstall the DPM protection agent from the protected computer. You must uninstall the agent manually.
Running this script will remove the protected computer from the DPM database (DPMDB) and from the trusted groups DCOMTrustedMachines and DPMRADMTrustedMachines.

Remove-ProductionServer.PS1

Syntax: Remove-ProductionServer.ps1 -DPMServername [DPMServerName] -PSName [ProtectedComputerName]

Wednesday, October 9, 2013

Step by step guide to setup Microsoft System Center: Virtual Machine Manager (SCVMM) 2012

Microsoft System Center: Virtual Machine Manager (SCVMM) is specially designed for management of large numbers of Virtual Servers based on Hyper-V and Microsoft Virtual Server. It is targeted for large enterprise organization. I feel lucky that from past 2 weeks, we were working on it. I would like to share my knowledge, so it will be easy for any system administrator to follow it.

Prerequisites:

Operating System:
SCVMM 2012 will install only on Microsoft Windows Server 2008 (x64) edition, Microsoft Windows Server 2008 R2 (x64) and Microsoft Windows Server 2012 (x64) edition.
Additional Software Requirements:
Microsoft .NET Framework 3.0
Microsoft .NET Framework 2.0
Windows Power-Shell 1.0
Windows Server Internet Information Services (IIS)
Windows Automated Installation Kit (WAIK) 1.1
NOTE: If you are having virtual server and database server in single server, then you need to install Microsoft SQL server but. But I personally refer you to install it both on different server.

Installation Procedure

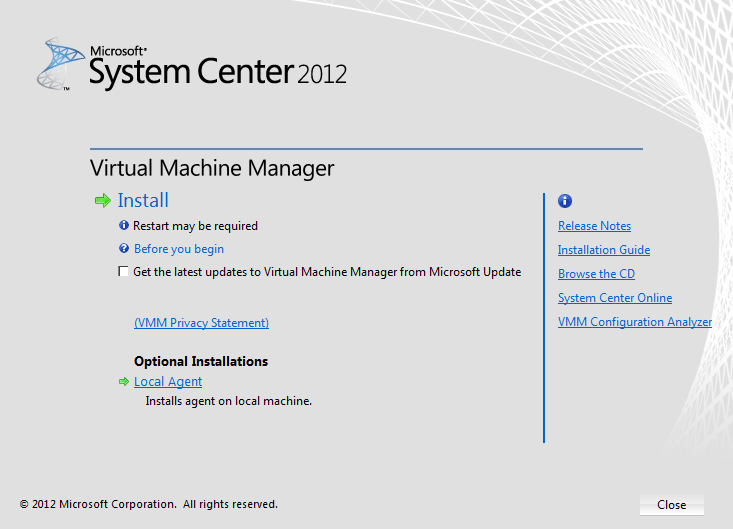
The installation process for SCVMM begins with the following interface after you run setup.exe:
Start with a click on Install.
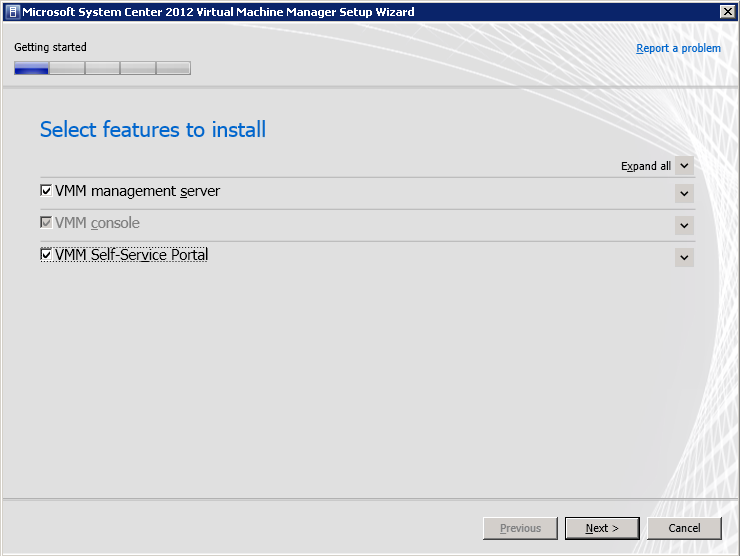
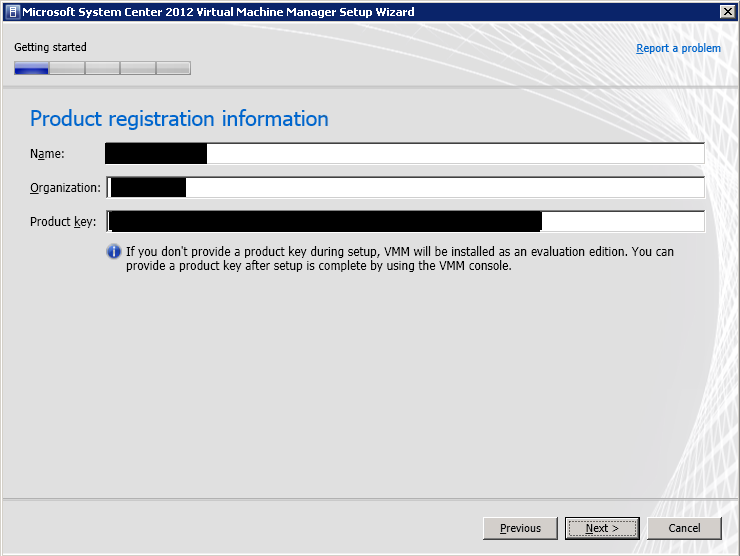
Here, as initial feature you have to install VMM administrator console, VMM Server and self-server portal (For self-server portal you have to configure ISS 7.5 before this installation)
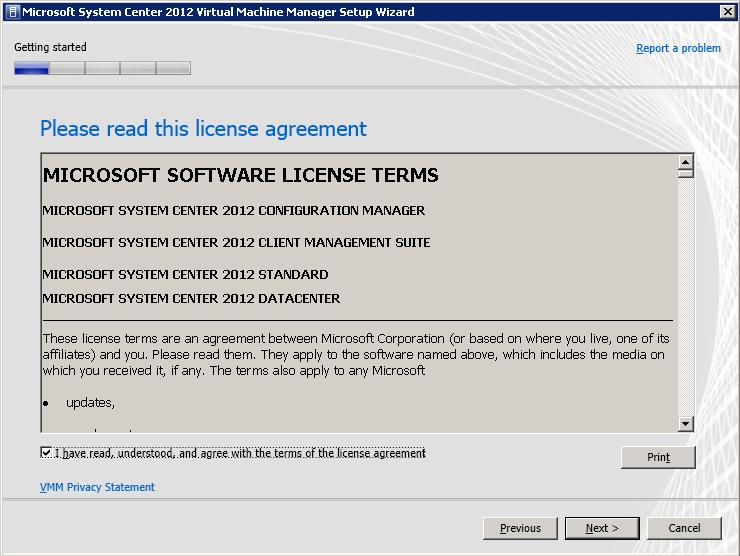
After this you need to confirm EULA then,
Now it will check the hardware and software prerequisites. (Note: You may get the warning if your Server RAM is only 4 GB, you can ignore it and then press next)
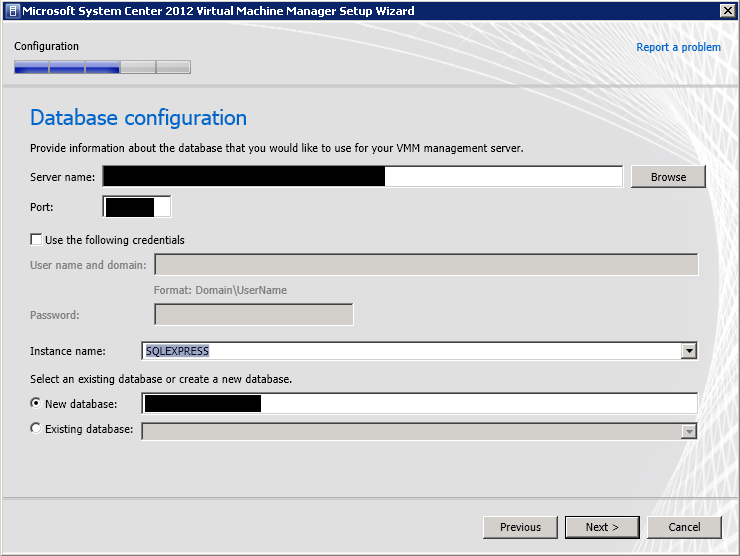
In next step, you need to provide your server name and port number with appropriate domain credentials from where you will access SQL Server database.
Note: If you have both database and VMM in same server, then just leave the above section. Provide your new database for it.
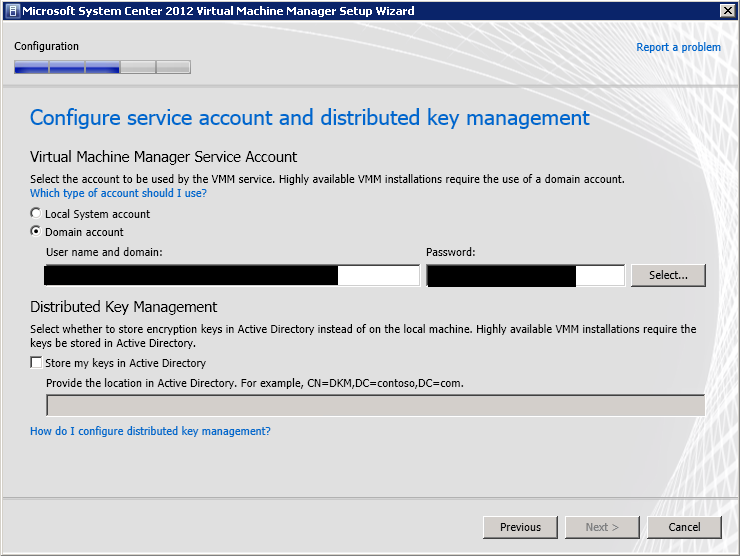
Provide your domain service account that you have created for SCVMM
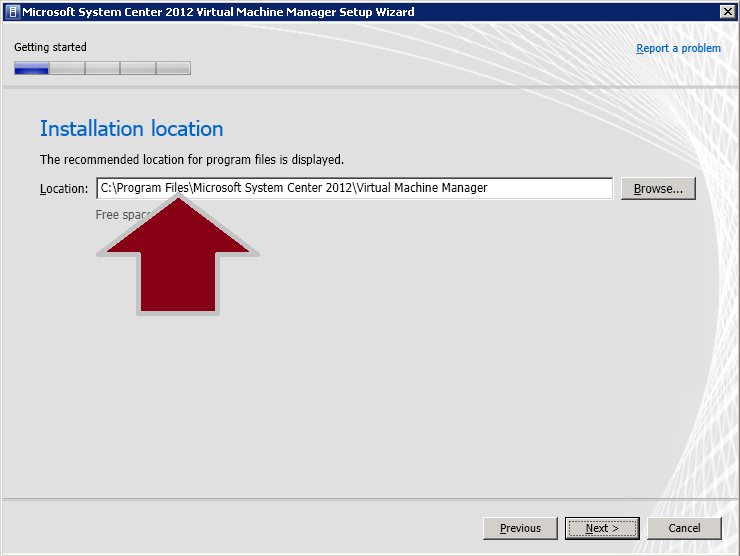
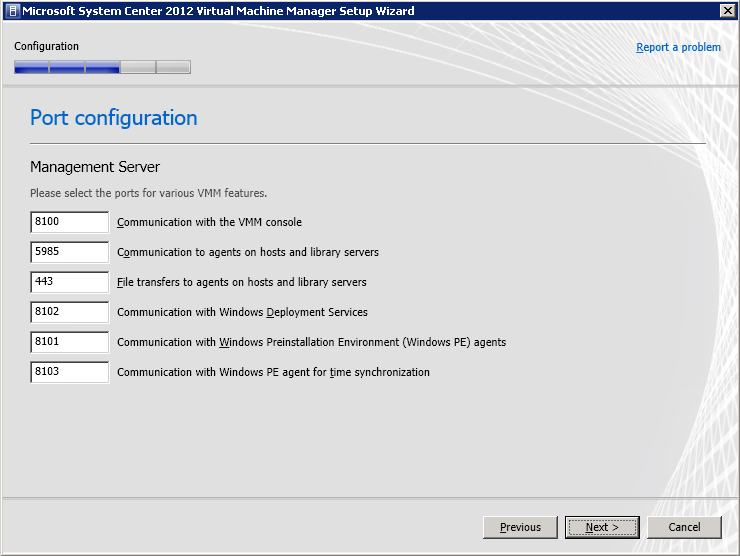
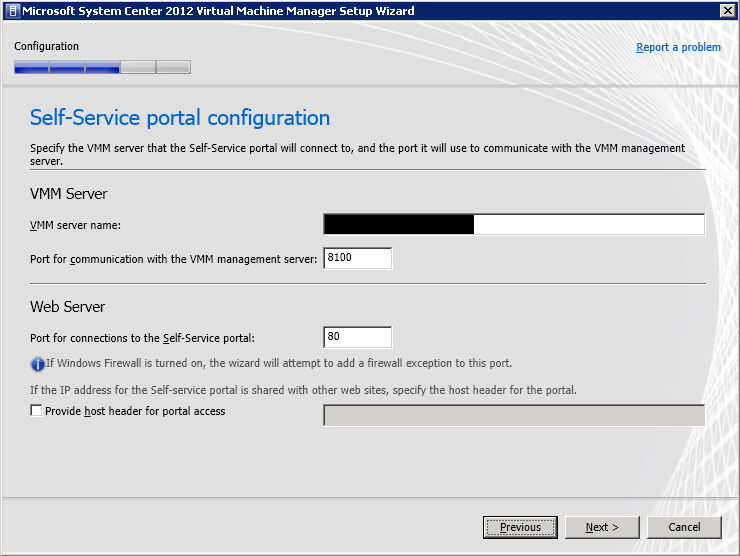
Accept default port number.
Press next with default settings on it
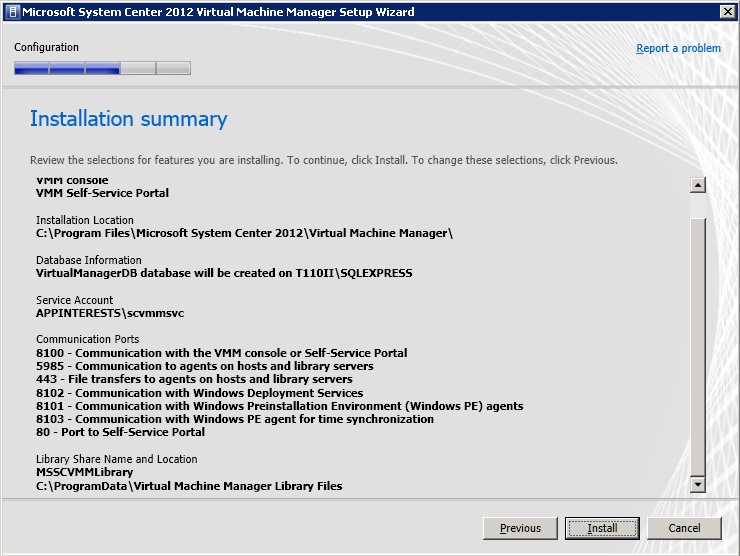
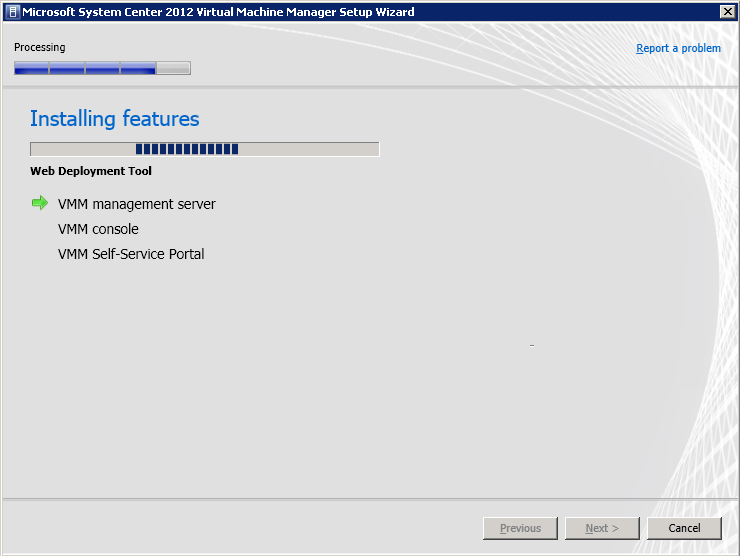
Press install to proceed for your final step
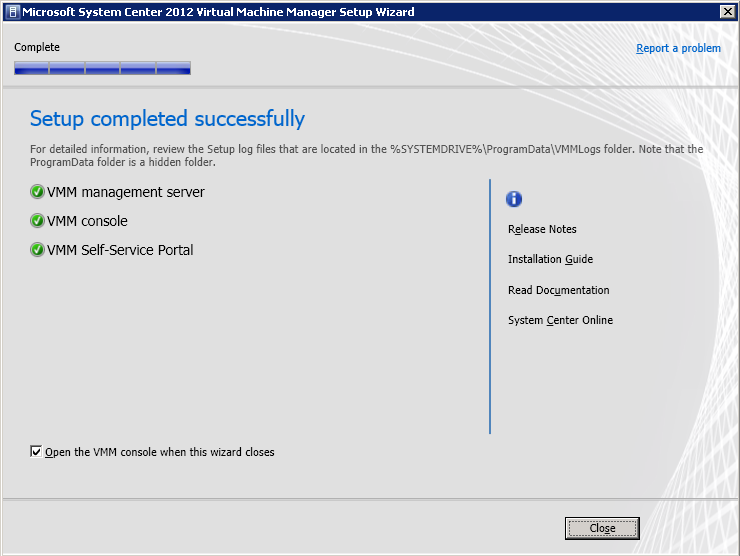
Final closeup windows look like this:
Now connect to your SCVMM with your mentioned address. You are ready to use SCVMM 2012 where you need to add a host to manage.
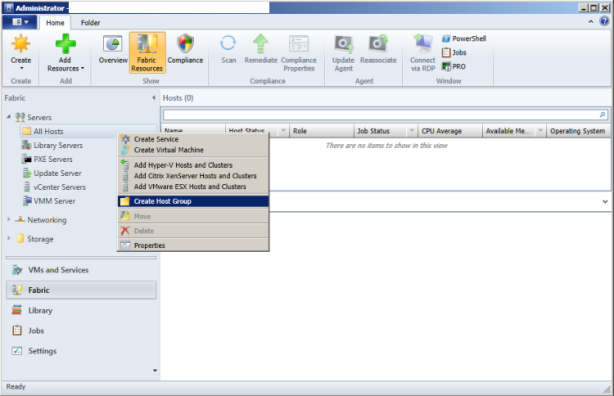
Home -- > Fabric Resources -- > All hosts --> Create Host Group
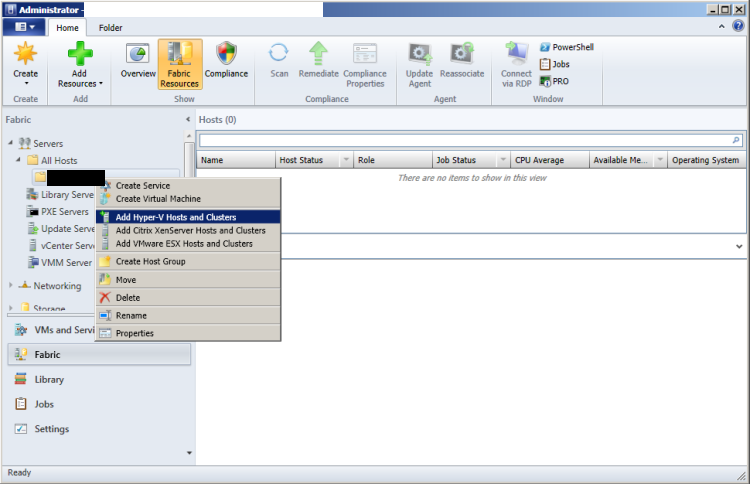
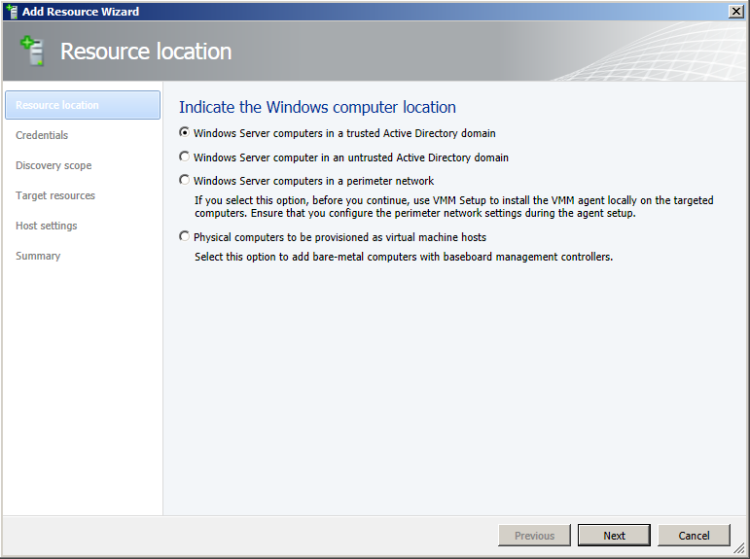
Provide the name of host group and “Add Hyper-V hosts and clusters” as shown in figure
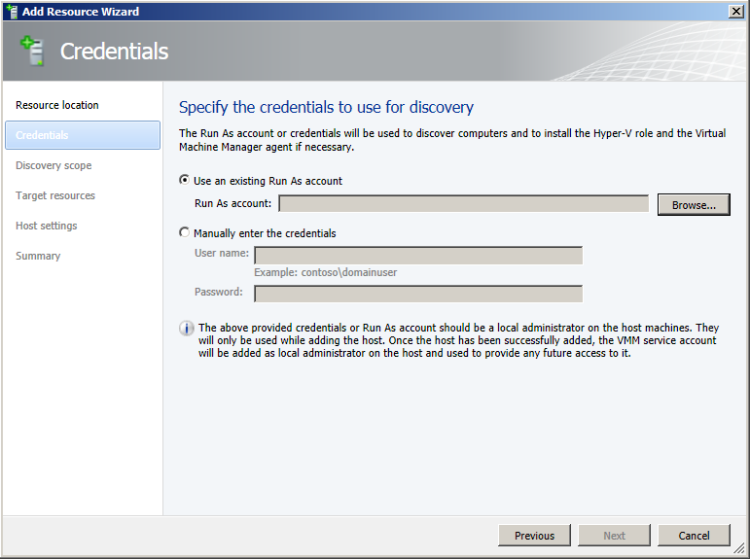
Click on browse for discovery. Otherwise, you can provide credentials manually of your domain name as show in example
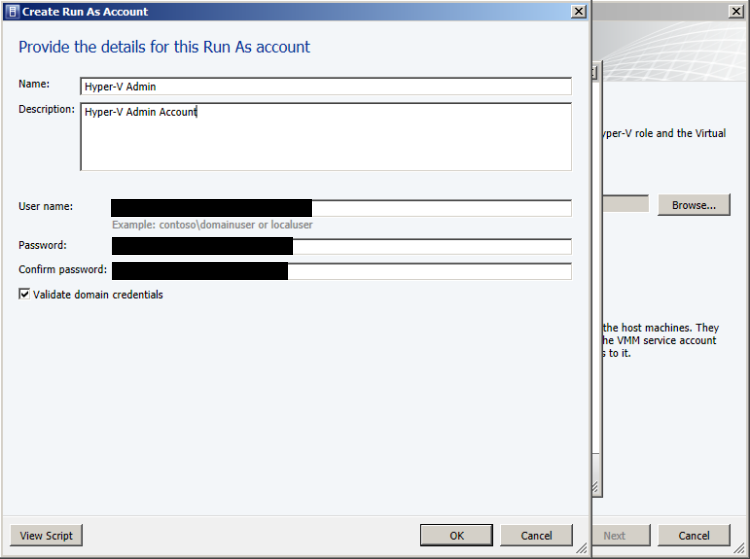
I have clicked on browse, which show wizard as below, where you can click on “Run as Account” and provide the name of account as shown in figure below:
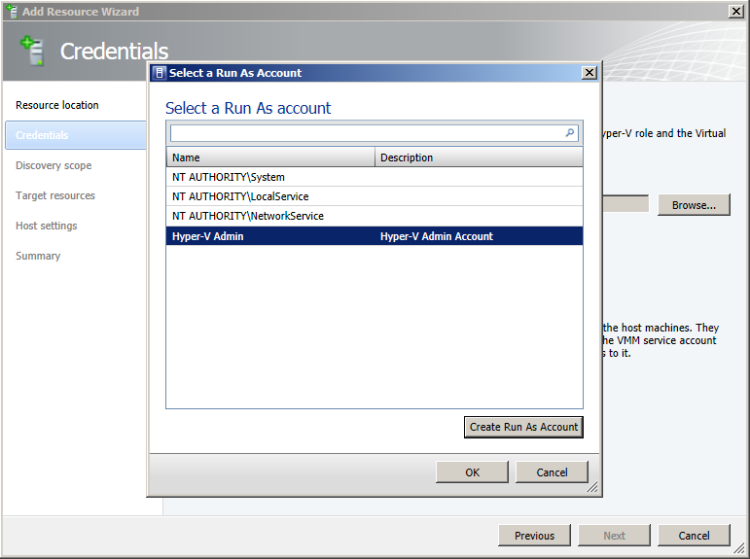
Now you can see that the account which we have created has been highlighted. Press OK
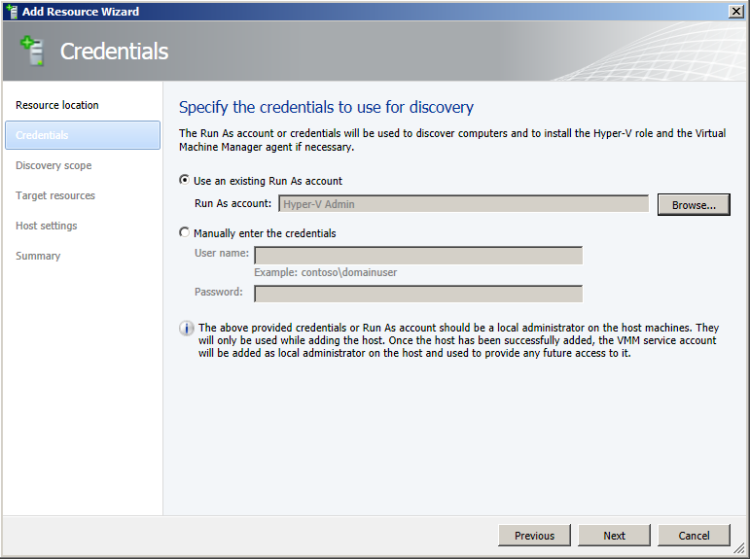
As you can see, the wizard is populated with Hyper-V admin for  “Run As account” for default.
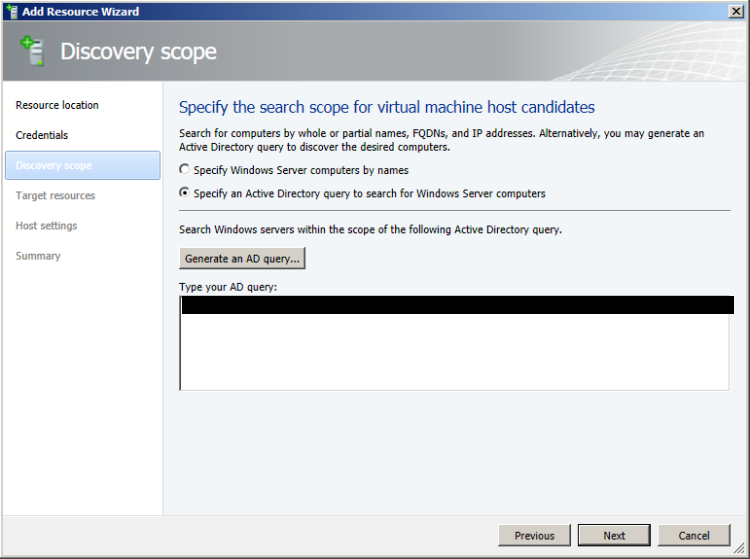
Click on ” Specify an Active Directory query to search for Windows Server computers” and then provide your domain name in detail as shown in figure
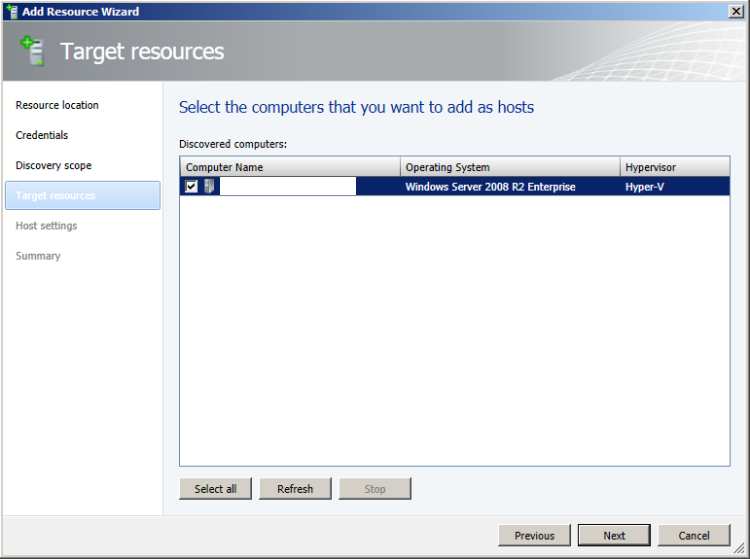
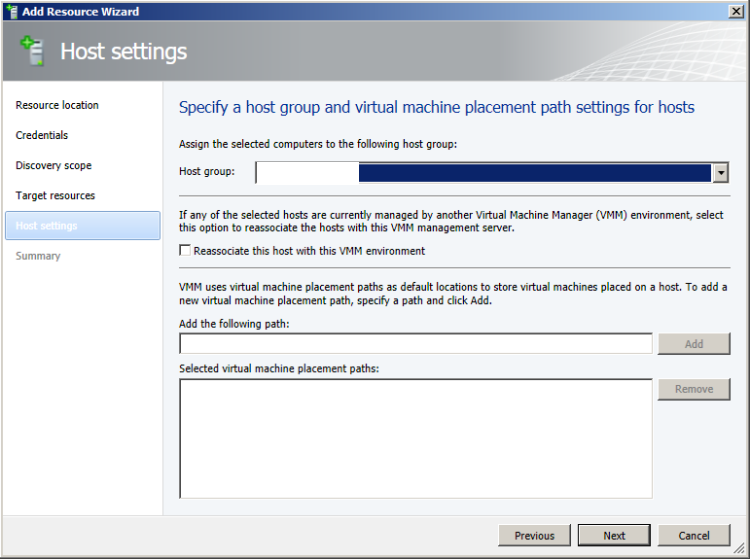
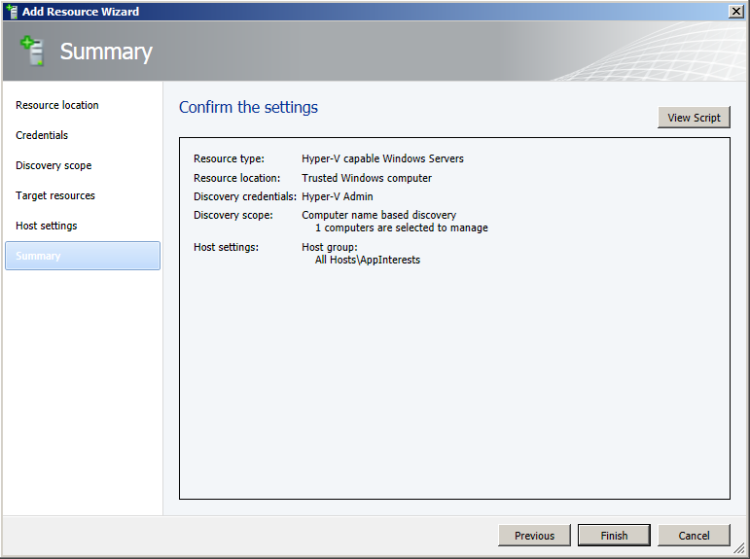
The provide the default host name that you have created a moment ago.
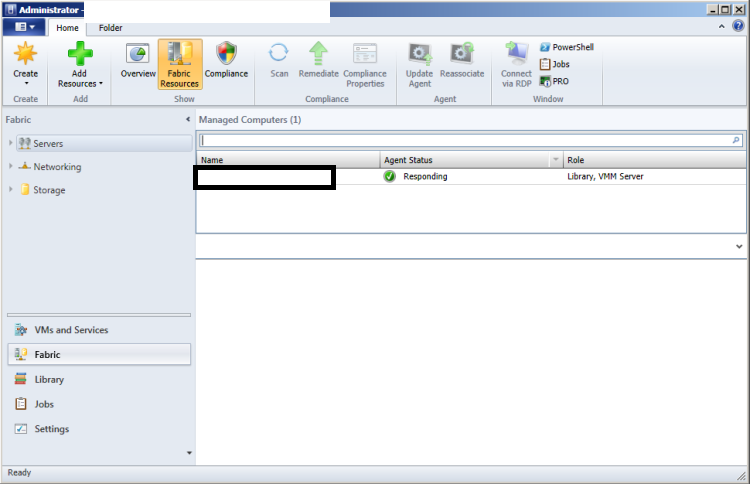
You can check whether your setup is working fine or not by seeing the “Responding” on Agent status.
This is how you setup SCVMM in your server. In next blog I will discuss about “How to add new VM in